Remodeling your house: Budget Wise

Remodel-Budget.jpg

Remodeling your house: Budget Wise The idea of remodeling may sound easy to most home owners, but remodeling the right way is a lot more complex. Adding square footage or remodeling existing rooms is a great way to increase the value of your home, though knowing how much money is too much or too little to invest isn’t easy. You can over spend on your projects and in the long run get money back to neither cover your investments nor be close to making any profit. If you do end up over improving you are running a gamble to find someone with the same taste as you and willing to spend what you are hoping to make.

Appraiser, John Bredemeyer, advises remodeling your home based off of the value of each room, based on the total value of your home.

See the following example based off a $500,000 home;

Kitchen 10%-20% home value: $50,000 – 100, 000 budget

Master Bathroom Suite 15% home value: $75,000 budget

Bathrooms 5% home value: $25,000 budget

Other rooms (living room, dining room, bedroom) 1%-3% home value: $5,000- 15,000 budget

Patio or Deck 2%-5% home value: $10,000-25,000 budget

You budget may vary depending on many factors like; size, addition or renovation, and cost of appliances and materials. Higher quality will cost more, but keep in mind the value of the room you are remodeling.


The top 3 remodeling projects that will add value to your home are:

1. Kitchen – Kitchens sell homes> Be careful to remodel smart because a $75K remodel may get you the same value as a $50K remodel, thus the importance of using the right company to represent you.

2. Bathroom - A bathroom can be remodeled for well under the cost of a kitchen remodel, but add the same kind of value. This is one room you don’t want to miss when you remodel.

3. Landscape & Hardscape – The outside of the home is the first impression of the rest of the house. If the outside is junky, this could cause you to lose value. Curb appeal is a real thing. Families these days are enjoying their homes and entertaining, a great outdoor space can increase the value of your home more than you think.

If you are planning this remodel project solely based off increasing your home’s value, you need to talk to a qualified remodeling company and consult with local home appraisers or real estate agents to make sure your remodel will meet your perspective goals. The homes around yours will affect your home’s value greatly, remodeled or not. Don’t be afraid to do your homework before your remodel. Contact us today to get a free in home consultation.

10 Best Holiday DIY for $50

10 Best DIY projects for under $50 There is nothing better than great DIY projects for the house. Here are a few of the best DIY projects for under $50.

1. DIY Macramé Curtain.  This easy curtain can be made with under $50 material and only a few hours’ time. This is perfect for sprucing up a closet that may be lacking a door, or a groovy entry way into a room.  Check out A Beautiful Mess for full instructions and tips on this Bohemian DIY Home décor.

diy remodel projects

2. Chevron Lamp Makeover. Got an ugly lamp shade? There is nothing a little tape and paint can’t fix. Take any old lamp shade and add paint for a new updated look. Try using tape as a guide for chevron stripes or design. Coco 29 did a great yellow chevron rendition.

remodel diy lamp

3. DIY Magnetic Knife Board. This space saver is great for those small kitchens that do not have ample counter space. By creating your very own magnetic knife board you get those knifes off the counter, and out of the reach of little hands. DIY Magnetic Knife Boards can be mounted anywhere, high or low, and can be tailored to any décor style.

diy magnet cutting board

4. DIY Closet Kit. I don’t know many people whom were born with the ability to keep their closet organized, but this DIY Closet Kit is perfect at helping those, and especially if you have kids. Find socks and underwear in little time, and possible even get rid of your old dresser that is taking up space. I personally love this idea and want one in the kids’ bedroom. Premade closet kits can cost you anywhere from $200+ dollars, make this one for $50.

closet kit diy

5. Concrete DIY Fire Pit. Perfect for those nights where a bon fire just is the right thing to do. The DIY Concrete Fire Pit can be made in only a few hours, and is ready to use when you are. Its sleek look will have every one asking where they can purchase one for themselves.

diy fire pit

6. Farmhouse Coffee Table DIY. Caution this table requires some pretty awesome power tools! It’s cool what a few scrap pieces of wood and some wheels can do for your living room. You can even skip the wheels if you have young kids that would turn this table into a sled, with or without the wheels it would make a great DIY Coffee Table.

coffee table diy

7. Staircase DIY Update. Get rid of the old carpeted staircase and in with the new sleek look. Demo, stain and paint, and you have a whole new house. Ok, you don’t have a whole new house, but you created a grand staircase with little effort.

stair case makeover

8. DIY Industrial Tables. Sometimes time is money. In this case this day project may not be for you, but it looks so cool. You can make end tables, or even a coffee table to match. This is for those whom love exposed brick and HVAC ducts, the Industrial lovers table this is.

end tables

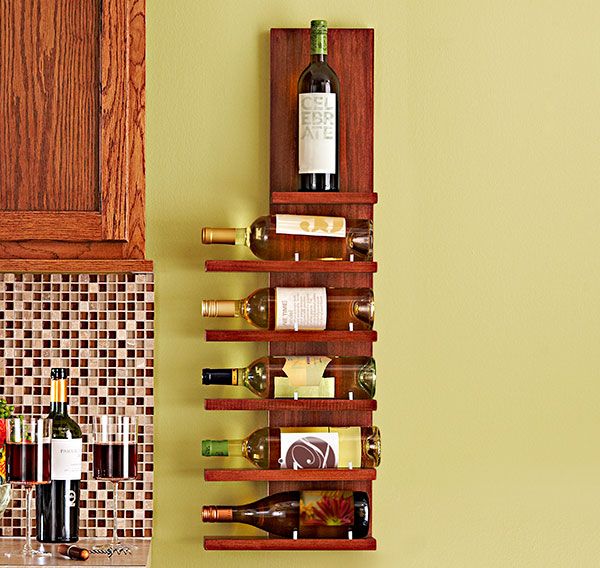
9. DIY Wine Rack. This is super chic and adds a spark to any décor. The best part of this is DIY Wine Rack project is the fact that it looks expensive. Don’t purchase one from the store, build your own and have something to be proud of in your kitchen.

wine rack

10. Kids Room DIY Crate Seats. You can find these plastic baskets in most stores, and kids usually use them to stand on anyways. Why not turn them into cute seats for the kids room, heck possibly even the living room. Crates, foam, fabric and wood – there you have DIY Crate Seats.

crate seats

We love to see your completed DIY remodel projects. Comment with your best DIY to date and pictures.

DIY @ Home Coffee Bar

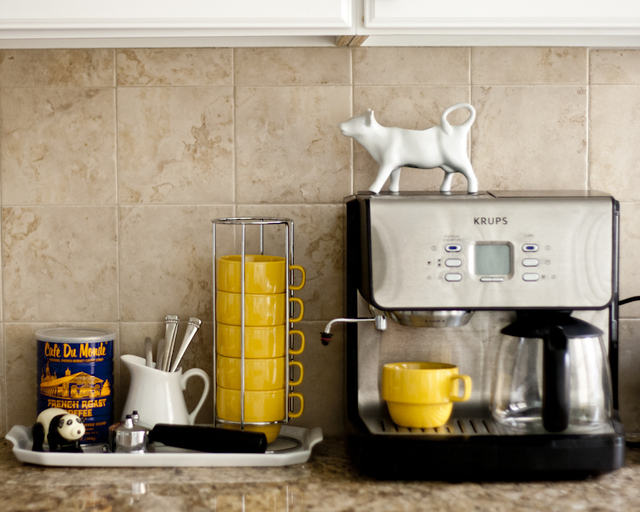
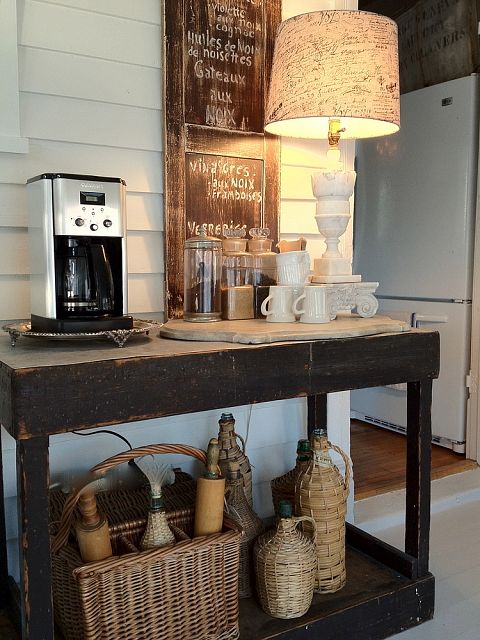
DIY @ Home Coffee Bar Are you among the majority of people whom start their day off with your morning dose of caffeine? Like many, I too start the day off with a coffee, whether it is hot or cold, it’s become my routine. Why not have my own coffee bar at home and save a few trips to the coffee shop? DIY Coffee bars are becoming a trend that you will want to be part off. Step up your plain coffee bar for a more elegant set up.coffee-apartment-therapy

Ample storage for your coffee mugs and supplies is important when planning your home coffee bar.

coffee bar remodel


coffee-bar

Try your hand at DIY and Upcycle an old microwave cart with a new coat of paint and wicker baskets to give your coffee bar new life. Don’t be afraid to scavenge local thrift stores for used furniture, a little sandpaper and paint never killed anyone.

coffee bar at home

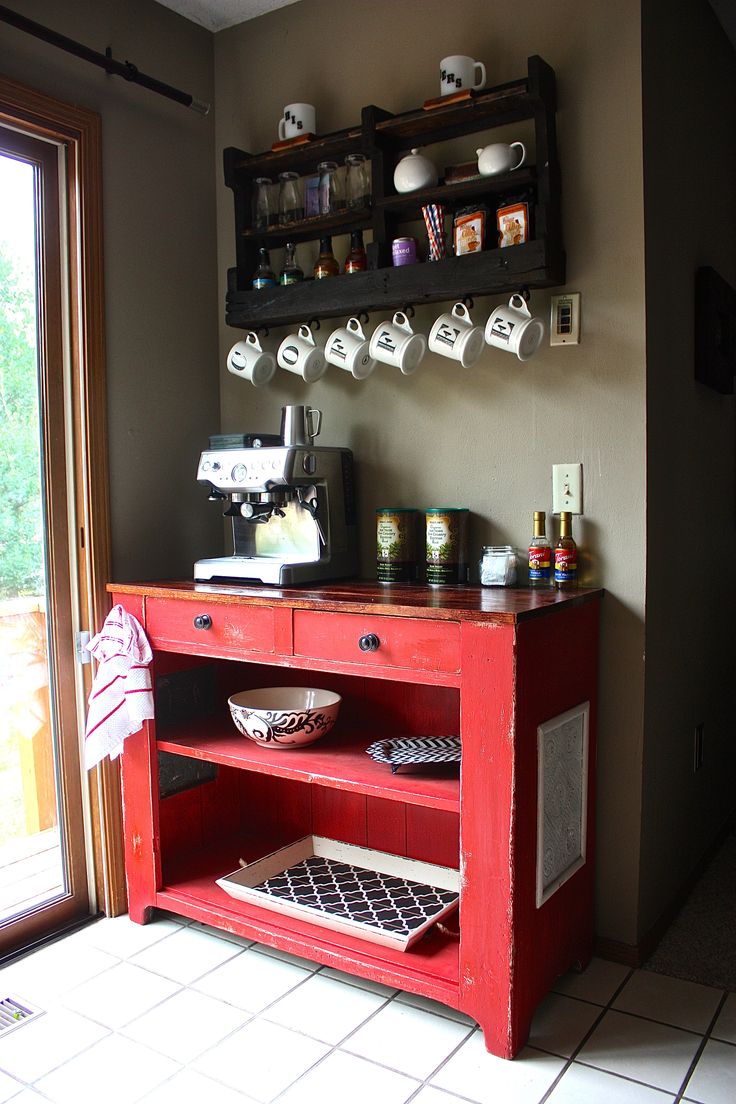
The storage unit above this coffee bar is a pallet project that has been remade into a shelf, with added hooks to hang your coffee cups. The idea here is to be simple, yet creative and your coffee bar will never fail. With the right décor you won’t even need to repaint your coffee cart. Take this red coffee bar for instance, it has seen better days – but the cute décor and coffee theme draw your eyes away from the peeling paint.


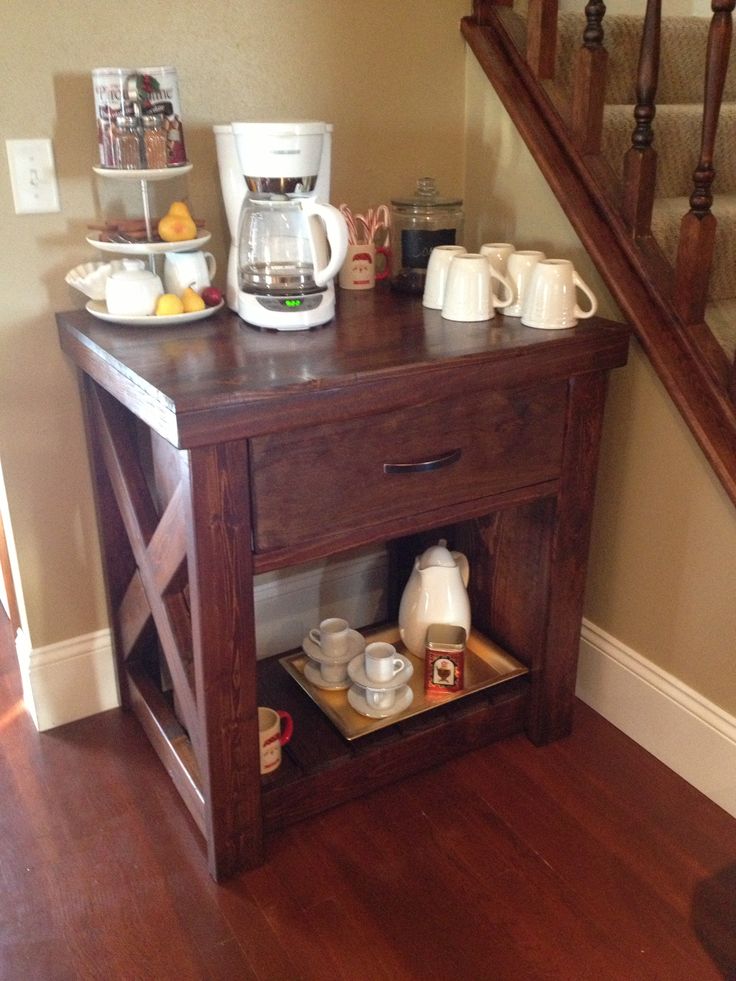
You don’t need a large kitchen or large space to have a great coffee bar in your home. Try repurposing an old end table for you coffee bar. Hang artwork or floating shelves above the end table to add extra flair and make known that this is your coffee bar.home coffee bar

coffee

This vintage end table would be nothing without the décor and table lamp. Perfect example of how simple can be elegant! Stick a theme to your coffee bar and don’t forget about décor.

Your Holiday home remodeling Wish List

bg_holidayHeader.png

Your Holiday home remodeling Wish List  

Dear Santa,

This year I have been nice! A few things that I am asking for are:

Luxe Countertops- Marble or Granite may be pretty. I am in need of something fancy to impress all my friends, and last as long as I will. You can even throw in a luxe backsplash if you must.

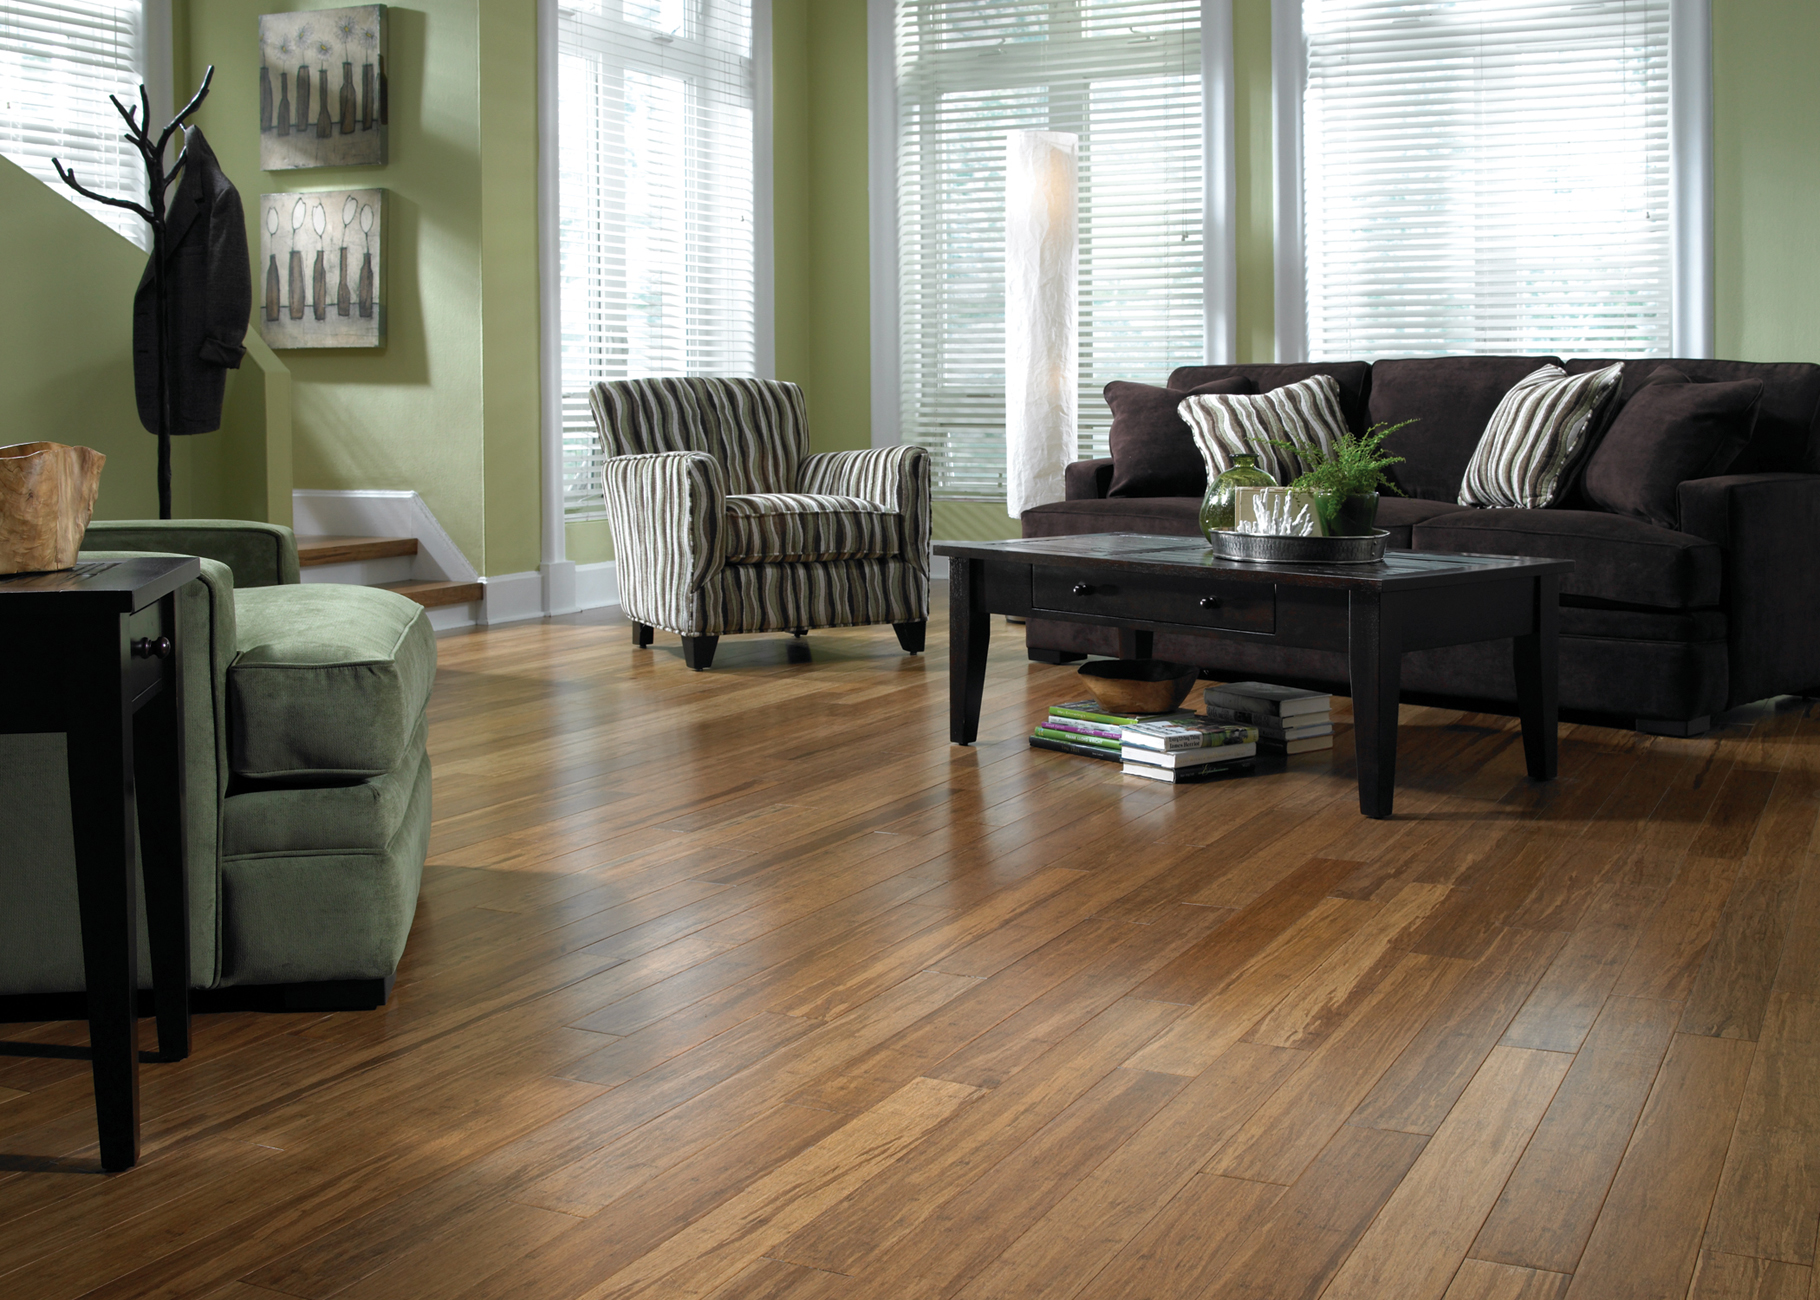
Floors- I am thinking hardwood or bamboo. Bamboo is eco-friendly and looks great. I would be happy with Wood, Terra Cota, or Marble floors. Something that will give me a rich look and last as long as my countertops. I need a material that is easy to keep clean and doesn’t need a lot of maintenance.

Drawers instead of doors – The kitchen is in need of desperate organization, and I would love drawers instead of doors. This hidden feature makes the kitchen look sleek and the organization factor leaves a decluttered elegance. Extra deep drawers would be great for pots and pans, and all those baking dishes.

Light – I need windows everywhere! Bringing the light from outdoors will limit my electricity usage and make me feel larger. In place of cabinets in the kitchen I would like large windows. More light will allow my rooms to feel larger and more open, giving me the free space I have always wanted.

Pantry wall – Better make it a Pantry room. Since we will be removing cabinets for windows, we will need a pantry built to store all of our goods. A floor to ceiling pantry will be a great addition and organization tool.

Upgraded appliances – I’m talking double oven, 8 burner stove top, high power venting hood and separate full size refrigerator and freezer. These appliances will make life easier and enjoyable for all whom enter the kitchen. I mean, who doesn’t want a professional kitchen?

Curbless, glassless shower and spa soaking tub – No more glass to clean after every shower and the seamless look of a curbless shower has me in awe. Adding a spa soaking tub will not only kick the bathroom up a notch, but add that luxury retreat feel.

Radiant heated floors – I have heard it can be quite chilly on toes stepping out of the shower or bath; I need heated floors in the bathrooms this Holiday to make sure toes stay warm.

Walk in closets – Walk in closets are a must on my Holiday list. Clutter, clothing, shoes and items build up over the years , a deep walk in closet in every bedroom would be delightful.

I hope that I am on the Nice list this year, as my list is rather small. :)

Sincerely,

Your house


Mistakes to avoid in your Bathroom Remodel

bathroom-gray-blue.jpg

Mistakes to avoid in your Bathroom Remodel Some things are meant for other rooms in your house, rather than your bathroom. Don’t waste your well earned money on your next bathroom remodel. Avoid bathroom remodel mistakes by avoiding these materials or colors.

1. Wall to Wall Carpet

carpet-bathroom

Carpet is majorly discouraged by the Center for Disease Control and Prevention.  Yes this is one comfy flooring to rest your toes on after a long bath, but this material harbors mold, mildew and bacteria. Ultimately carpet in your bathroom is a health concern, more so than a decorating fail. 30 years ago this was a big trend in the remodeling industry, now we are more aware of the risks imposed by carpet in bathrooms. Skip the carpet and opt for a few bathroom throw rugs that can be washed and dries regularly. Tile flooring in bathrooms is a great surface to choose when remodeling your bathroom floor. Tile is easy to clean and disinfect, durable, there are a millions design and color options and will last as long as your bathroom.

2. Wall Paper

We all see the fancy bathrooms in the magazines that display lavish wall paper; fact of the matter is that any high moisture will cause the wall paper to peel eventually. Think about this, why use wall paper in a steamy room, when people use steam to remove old wall paper? Your bathroom produces the most moisture and steam in the whole house. If you must, absolutely must, have your bathroom wall papered – use a high quality, Vinyl wall paper. DO NOT attempt to use a peel and stick wall paper, this will be a waste of time and money. Peel and stick wall paper will bubble and peel within weeks if not days. Wall paper will last the longest in half bathrooms or bathrooms used less frequently.

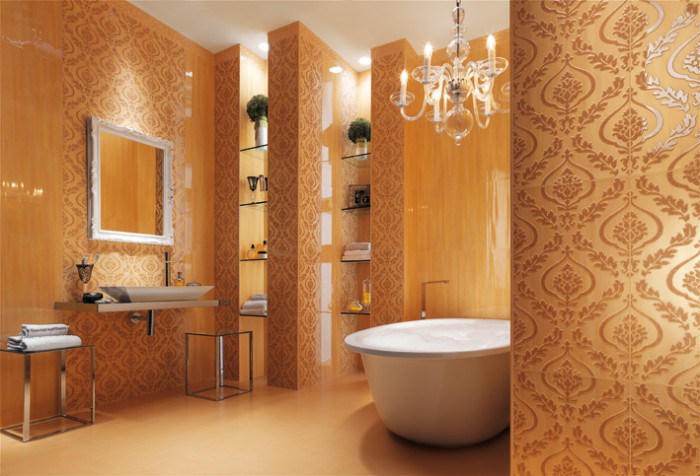
cream-wallpaper-look-bathroom-tiles-700x476

3. Yellow paint

Avoid breaking out the Canary Yellow paint for your bathroom remodel, as this color is not a great choice for bathrooms. Yellow and yellow tones can make a bathroom look brash, and create a room that obscures your reflection. Ladies, note to self, don’t apply makeup in a yellow room. Choose colors that have a gray or blue tint to get that Spa like feel in your bathroom. Also consider the size of your room before picking a paint color. Darker colors are best suited for larger rooms, and light colors for small rooms.

bathroom-decorating-ideas-yellow-color-paint-tiles-22

Easy DIY Floating Shelves on a Budget

Astounding-Lowes-Wall-Mounted-Shelves-Decorating-Ideas-Images-in-Kitchen-Traditional-design-ideas-.jpg

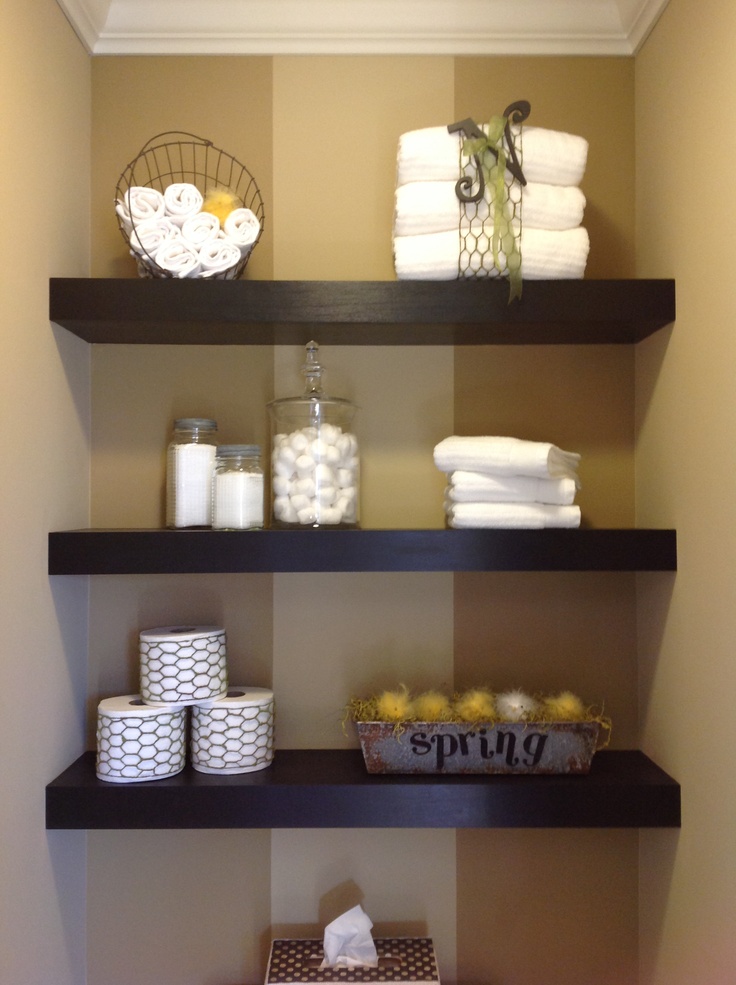
Easy DIY Floating Shelves on a Budget shelves2

Holiday shopping is here, and you just had to wipe the drool of your face from admiring the Floating Shelve selection. The shelf was the only thing you admired because they price tag wasn’t so appealing. Here is your chance to DIY them yourself, save money and impress people with your handyman or woman, skills. It’s easy, fast and you will be more proud to show off these shelves than you will be to have admitted to spending $60 a shelf from the store. You will spend about $15 per shelf if you DIY this project! That is a killer savings if you ask me.

It’s as easy as 1.2.3

1. Build frames and attach to wall

2. Build frame enclosures

3. Paint or Stain your Shelves

Step 1: What you will need to do first is build your frame for each shelf before you install. This frame will consist of 4 pieces of Pine or Whitewood Board if you were to make them 32inches long; the piece that is going to be attached to the wall will need to be measured to the length where you will want these shelves to be installed or your desired length of choice. The three other pieces will act as your shelf supports, and be cut to the desired depth of the shelf, and attached to the 4th piece.

shelf

Approximately you want your supports every 10inches to make sure your shelf frame is sturdy.

Once you have your frame built, you will now move on to attaching these bad boys to the wall. Attaching these frames to your wall will require a stud finder and wood screws. Run your stud finder along the wall, once it beeps indicating a stud you will need to mark where your studs stand, now hold your frame to the wall and mark on your frame where the studs are. Once you have this done you need to predrill your holes, before attaching to the wall. Drill your frame directly into the wall and stud using the holes you predrilled.

Step 2: Measure a piece of ¼ inch plywood to the length and depth of the shelf frame. Once you have measured your plywood, attach the plywood to the bottom of the shelf.  You can attach this piece using Wood glue and Brad nails. Plywood can be used for this piece since you will not rely on this side of the shelf for support. In other words you aren’t going to set anything on the bottom of the shelf so using wood that is thin is acceptable. The top piece you will want to attach in the same manner as the bottom, a piece of 1X10 whitewood board, and each side will be 1X4 whitewood board all measured to size. Now that you have the frame enclosed your shelf should look like a shelf.

DIY-Floating-Shelves-How-To-500x750

Step 3: Paint or Stain your shelves. Be sure to tape off the wall before starting this final step, unless you want paint on your walls as well as the shelves.

DIY-Floating-Shelves-Tutorial-500x750


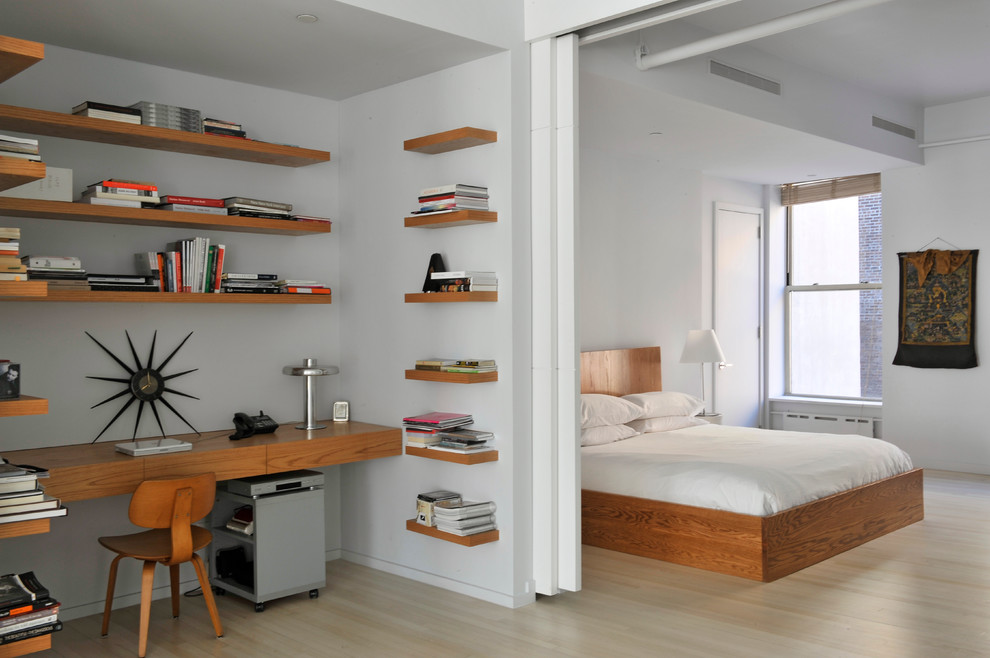
Floating shelves are so versatile you can add them to any room.

Graceful-Bedroom-Contemporary-design-ideas-for-Chunky-Floating-Shelves-Decorating-Ideas

floating shelf bar

Inexpensive, Unique and totally DIYable Backsplash

Inexpensive, Unique and totally DIYable Backsplash Who said your backsplash has to be expensive and boring? Get that idea out of your head and let your creative DIY side come to shine with these Kitchen Backsplash ideas. You can spend $1000 on your backsplash or you can spend as little as $60. The choice is yours, but be sure not to choose until you have read this article.

$60 Penny Backsplash: The texture, color and shine of the pennies create a visually interesting backsplash for your kitchen. Use the pennies in random combinations or create designs within the backsplash featuring different shades or sides of the pennies. You can achieve the look you want and save money by completing this project yourself over a weekend. You can achieve this look with Pennies, Clear Mosaic Mounting Sheets, Waterproof Tile Mastic, Waterproof Tile Grout and Sealant. This look takes patience, but is well worth it in the end. Check out this DIY Blog for Step by Step detailed instructions.

penny backsplash

Cork Backsplash: Well, if you are a wine lover you may have these piled up. However if you don’t happen to love wine you can purchase Cork off of Amazon for around $15 per 100 corks. For this DIY cork backsplash the corks were sawn in half and cemented to a backboard. Check out this amazing cork backsplash that used 800 corks, which means 1600 cork halves.

cork backsplash

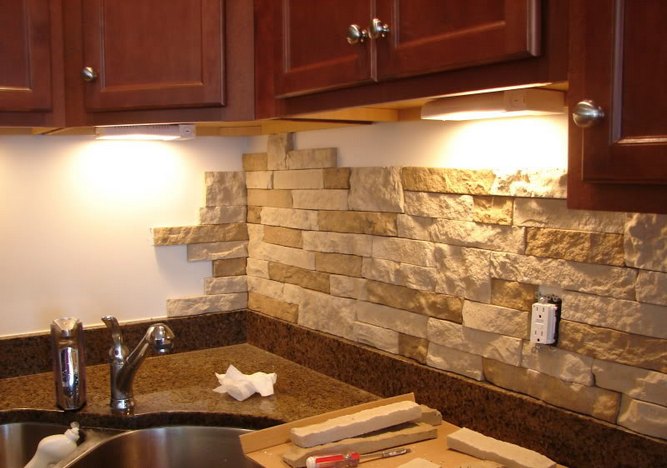
Stone Backsplash: Home Depot and Lowes carry Peel and Stick Faux stone backsplash panels. Peel and stick panels are great for those who do not want to attempt grout and grout sealant. Measure your surface area before you attempt to start sticking away, you will need to pre-cut before starting. Local home improvement stores do carry panels of tile or stone that need to be grouted, take a close look at the label before you go home with the wrong stuff.

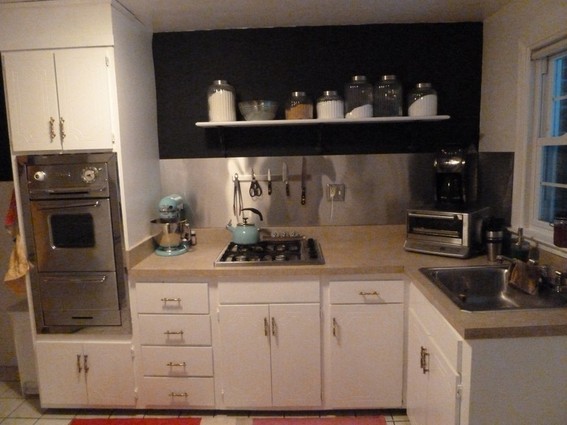
DIY-Cheap-Kitchen-Backsplash-Ideas24 home decor zielFlashing Backsplash: A very easy backsplash project that will cost you under $60, Aluminum Flashing. You can find Aluminum Flashing at almost every hardware store in an array of widths and finishes. Since the flashing is so thin and light weight you can directly adhere the flashing to the existing backsplash or wall and cut to size with a box cutter. Use an aluminum molding to tuck your edges in for a clean finishing edge. This project is fast, simple and budget friendly. Check out this transformation.

flashing backsplash

You don’t have to break the bank to get a great backsplash, just some creativity and time. Good luck to your future DIY kitchen backsplash.


Small bathrooms on Small budgets- Contractor Included

Small bathrooms on Small budgets- Contractor Included  

Congrats you are ready to redecorate and redesign your bathroom, very exciting!  But dropping $17,000 on a spa retreat is light years away from what you can afford to spend today? I’ve got good news for you: You don’t need mega-bucks to transform your bathroom into a relaxing escape. There are plenty of ways to renovate and redesign on a budget. Without having to skimp on a contractor!

According to Home Renovations Expert, Lee Wallander, the national average for a bathroom remodel is around $16,000 to $17,000 based on a 35-40 sq. ft. bathroom remodel.

Ok, now is your chance to admit it, you thought about doing this bathroom remodel as a DIY project? Its ok we all have thought about DIY to save money. Don’t go there, it’s not worth it. You will waste more time and money in the long run. There is a better way to utilize your small budget to renovate your small bathroom.

Finding ways to save money isn’t looking easy when you want Granite countertops and top notch fixtures, but it isn’t impossible. When countertop shopping for your bathroom remodel, avoid common colors such as tans and neutrals, these colors are higher priced as they are in demand. Opt for a broad range of colors, and encourage imperfections. Who wants imperfection? Imperfection equals lower priced granite countertops. Your sink will take up most of your countertop anyways, so no one but you will ever know you bought an imperfect piece.

Fixtures are an easy update and you can find inexpensive fixtures if you are shopper friendly. Compare lots of pries before you set sights on that perfect fixture. Craigslist and EBay can have hidden gems as well. Though, if you have the need to get your hands dirty we have the perfect DIY idea for you. Have paint handy? Want a DIY project for your bathroom remodel? Buy a good quality spray paint to give your fixtures a makeover and save money! This project will require patience, paint and drying time. Ensure that the fixtures have adequate drying time in between coats of paint so you don’t have peeling fixtures later on. This is a great way to salvage old fixtures without spending more than $20.

We wish we could DIY all of our bathroom remodel needs. Flooring is one area you don’t have to DIY, unless you want concrete floors, or to tile yourself, but you can save money (still using a contractor) if done the right way. If you are installing tile floors in your bathroom remodel, we can give you a few tips to save big money. When shopping for tile, look for sales on tile. Most stores have blow out sales to sell the last of their inventory. Check with your local store to compare prices. Some tile companies have left over tiles from jobs that they are willing to sell at ultra-low prices, snag those up if they are the right price. Remember that an overly done up bathroom will not make you anymore money in the long run, so sale items are ok. No one needs to know you are a smart shopper, but your mom, she will be proud!

These are just some of the ways you can save money when remodeling your small bathroom. For more ideas or help, contact us today.

Minus the Home Addition Mistakes

addition.jpg

Minus the Home Addition Mistakes There is no wrong way to do a Home Addition! Oh, yes, there are many ways to do a home addition wrong. Avoid having to tear down your Home Addition by following these top 5 simple rules.

contractor

1. Hiring the wrong Contractor or Remodel Company.

You will lose the most money and waste the most time if you do not pick a qualified contractor. You want to be sure the Company you hire has good references, including work completed on time, work completed to the clients standards and within budget. This is the time to ask questions and be sure you have the right crew to support you in this Home Addition.

2. DIY Home Addition.

Any large scale project involving home addition or remodeling your house should be done by a professional. Budget, permits, inspections, and everything else that comes with home additions should be left to someone well experienced in this field. DIY is not the only way you can bring your dream to life or save money, ask your contractor for money saving options or if you can do demo to save money.

3. Salvaging the wrong materials.

We understand that home improvements are not cheap. Saving money is ok, but salvaging the wrong materials will cost you more money in the long run. Salvaging materials will depend on the quality of the material and the damage caused to it after removal. If you are worried about being ecofriendly or saving money, try purchasing your building materials from a reclaimed wood yard or even checking for used light fixtures, cabinets, or shelving. If you are craigslist savvy you can check listings there, some people may have under gone a remodel and have good items you are looking for.reclaimed wood

4. Thinking of building without proper permits.

Building without the correct permit is never a good idea. You can suffer large fines and possibly have to tear down your addition. Your contractor should know the appropriate permits you will need and when to apply for them. If you have questions about building permits you can check with your local Building and Safety Department to get your questions answered.

a-look-at-the-budget

5. Not sticking to your budget.

This home addition isn’t going to be cheap, but you don’t need to go into debt to get it done. Have a set budget lined up before you start, and stick to it. Make your Home Remodel Company aware of your budget and how you will not have any room to increase this budget. Keep in mind that you may have to give up a special feature if something comes up in your project that eats at your budget.

Home addition doesn’t have to be a nightmare.  Let us help you increase your home’s resale value and improve your enjoyment. Contact us today!

Get in shape with your very own Workout Oasis

home-titan.jpg
Get in shape with your very own Workout Oasis

home-gym-entertainment

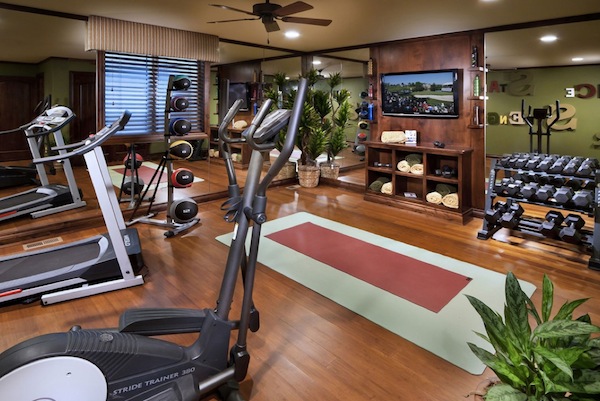
Adding on a home gym can add resale value to your home in much the same way as adding any other addition would.  Just as finishing an attic space or adding on a laundry room would increase the resale value of your home a Home Gym will as well. If this is the year that you vow to get in shape, but hate the packed group classes or the high membership fees, it’s the year to build your own workout oasis. It’s going to be just you and that treadmill to compete with.

If you are going to add value to your home with this addition, you will want to put more effort into this rather than transforming your garage into a sweat shop. Home buyers will pay top dollar for quality, and this means additions done the right way. Now Remember: Anything bolted down, such as exercise equipment becomes part of the home and would be included in the sale of the house unless removed before selling or including a clause in your sale agreement.

You will want a space at least 150sq ft., the bigger the better though in this case. If you can build this gym as an addition you will have more freedom to make space for equipment that you want. If you are repurposing a room you will have to make do with the existing square footage and possibly have to give up on an important workout machine. Not only will you be sacrificing space, you will need to increase ventilation in your home gym.

Gym Essentials:


1. Dumbbells

2. Kettlebell

3. Pull Up Bar

4. Rings

5. Jump Rope

6. Medicine Ball

7. Plyo-Box

8. Barbell

9. Weight Plates

10. Stereo System


Number 10 on the list is number 1 for me. Having a great stereo system and a few t.v’s is important, this way you can catch up on the news or listen to motivational tunes while working off those calories.

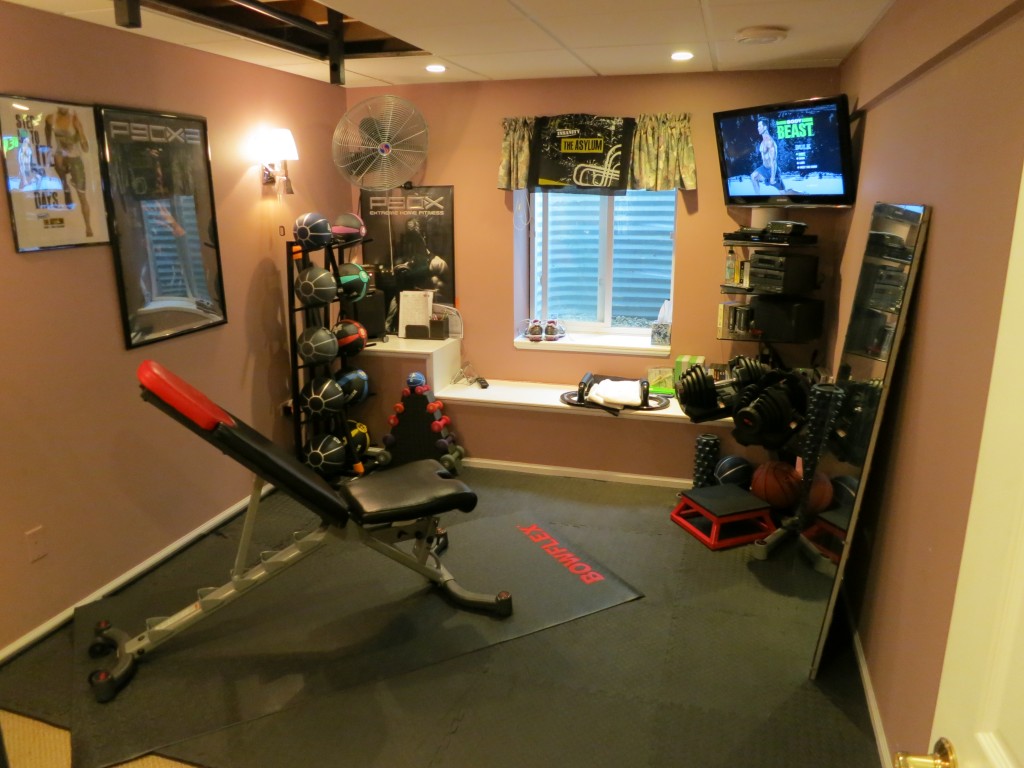
Tip: Rubber mats and barriers to protect your floor are good investments you will want to make with this home gym. You don’t want a dumbbell dropping through your wood floor.

Laminate or wood flooring is ok for your home gym addition if you plan only for light workouts and no heavy machines or equipment. If you are planning for more strenuous workouts and heavy duty machines you should aim for Rubber Floor Tiles or a Rubber Mat. You can purchase most gym flooring material and equipment online. Prices can vary for different machines and weights, check your local listings and reviews before you make a large investment.

When doing any home addition or remodel, having a good Remodeling Frim on your side is imperative to save you money and do the job right. Contact Spazio LA if you are thinking of adding or changing your home. We would love to help build your dreams!

home gym

How to build a Home Theater in a few steps

modern-media-room.jpg

How to build a Home Theater in a few steps modern-media-room

These days home comfort is a must to a happy life. There isn’t anything more comfortable then a movie theater right in your very home. No large crowds, dirty seats, and overpriced goodies. Get the quality of the movie theater in your home for your own personal enjoyment. There are 8 key steps that you must take to get to this movie theater level.

Steps to a Home Movie Theater

Location: Isn’t location always the first step? A good size for a home theater is 20ft by 13 feet if you are planning on doing this as a home addition. If you are looking to use what you have already, opt for a spare room that is at least 12ft by 12ft. You will want a location that is secluded from the rest of the home as to not disturb the surrounding space with noise. You will need to pay special attention insulation with this project. A rating of R30 is standard for the ceiling, floor and exterior wall insulation, though you will want to insulate the interior walls as well. Having R11 packed into the walls can reduce noise from rocking the rest of the house but you will need more after all the wiring and sound system is installed.

Original_Sherry-Rauh-home-theater-leather-seating_s4x3.jpg.rend.hgtvcom.616.462

Surround Sound: Home movie theaters used to use a 7.1 surround sound system, though now you will want to do a 9.1 system to maximize your home theater experience. A 9.1 surround sound system merely means you have 1 subwoofer and 9 speakers.

You will want to have your speakers in these locations:

  • Center – just above or below the viewing screen
  • Left/Right – on either side of the screen at ear height
  • Front Row – two speakers in the very front of the room
  • Side Surrounds – on the side walls just behind the main row of seating
  • Rear Surrounds – on the back wall (how far apart depends on the system)

Projector: Of course you need something to watch while you listen to the great surround sound you just installed. For a realistic, large-screen theater experience, you'll need to pre-wire a projector system. This involves just two cables:

  • An HDMI cable to carry high-definition video to the projector
  • A CAT5 control wire for accessing the projector with a radiofrequency (RF) remote. This will let you start your movies without pointing at the projector.

One end of these cables should extend from the ceiling at the rear of the theater, where the projector will hang. The other end should connect to your equipment hub. Be sure to pre-wire the hub with your cable or satellite feed, as well as high-speed Internet for streaming video.

Lighting: Installing appropriate lighting is an important feature for your home theater. Having remote controlled and dimmed lighting will set the atmosphere and take your home movie theater up a notch. Floor or aisle runner lighting is also a good idea to add.

Theater3_April_12_2010.23465805_large

Drywall and Final Sound Barriers: You will want to use a heavy duty drywall over your insulation, such as QuietRock Soundproof Drywall. This drywall can be very expensive and if it is over your intended budget, you can opt for regular drywall lined with sound dampening materials.

3ffcdc2d2ac568525bbe431b85ff6484

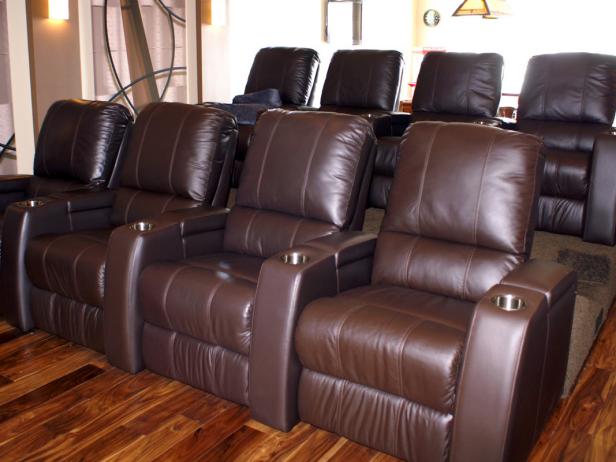
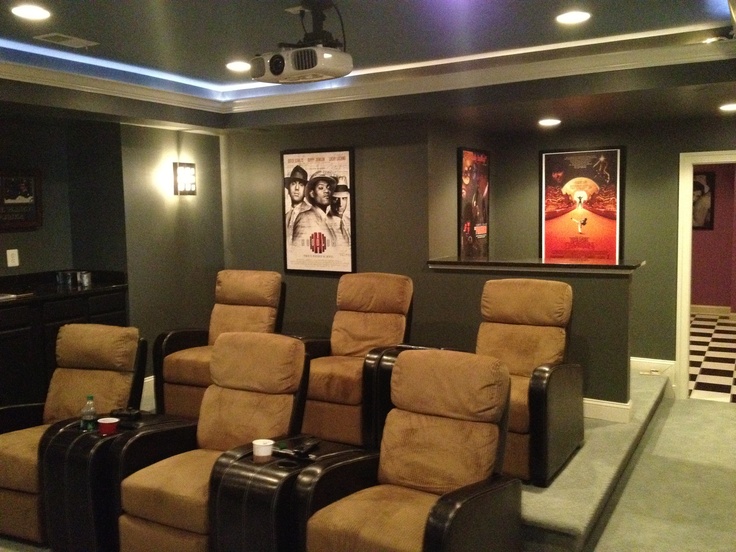
Final Touches:  Now you can install your video and sound systems, and lastly your theater style seating. A good Blu-ray player will do far more than play discs. Through a pay-per-view service like VUDU, you can stream high-definition movies off the Internet whenever you like. Some Blu-ray players also network with your personal computer, making it easy to enjoy photos, music, and home videos in your theater. Theater seating comes in a wide range of styles, including genuine leather with cup-holders in the armrests. These are the kind of seats that beckon you to sit back, relax, and enjoy the feature presentation!

Enjoy your Home Movie Theater!


Building a custom Wine Cellar in your home

wine-cellar.jpg

Building a custom Wine Cellar in your home traditional-wine-cellar

Wine aficionados have one, why can’t you? Adding a wine cellar to your home can increase the value, give a focal point and most importantly preserve your wine collection. There are a few things you need to think of before you take the leap and start remodeling. Temperature, humidity, light and vibration are things that need to be considered.

When choosing a location for your wine cellar location is everything! Most people keep their homes at the 70 degree temperature; a wine cellar must maintain a 55-58 degree temperature and 50-75 percent humidity. This means that you will want a room that isn’t frequented often and remains colder than the rest of your house. Basements, attics and garages are usually the best first choices.

Windowless areas are a must when choosing a location for your wine cellar addition. The ultraviolet rays found in sunlight can do serious damage to your wine, particularly if the bottle is made of clear or blue glass. You can invest in special low-UV lighting for your wine storage area, or you can take the low-tech route and cover your windows and wine racks to prevent light from reaching the bottles. Even artificial lighting can ruin wine, so dimmable lighting is a good choice.

Your floor will play a major role in your rooms’ humidity, thus being said carpet is not an option in your wine cellar. Hardwood, granite tiles and porcelain tiles are a good option for flooring. Not only is flooring important but your walls must be properly insulated as well as the door. Keeping your wine cellar at the right temp and humidity level is the most important thing.

Choosing the right cooling unit will make your life easy to maintain adequate levels. You can opt for a split cooling system, through the wall system or duct cooling systems. Ducted cooling systems, where the entire cooling unit is located remotely and cold air is ducted into the wine cellar, are the most expensive wine cooling systems. Their main advantages are that the wine cellars won’t be subject to noise from the cooling unit, and commercial systems can be serviced by most HVAC professionals. In addition, space in wine cellar can be maximized for wine storage, because the cooling unit doesn’t take any space inside the cellar.

This will end up being the easiest room to maintain, they require less maintenance then most rooms in your house. Once you have the climate controlled you will be able to enjoy this classic addition.

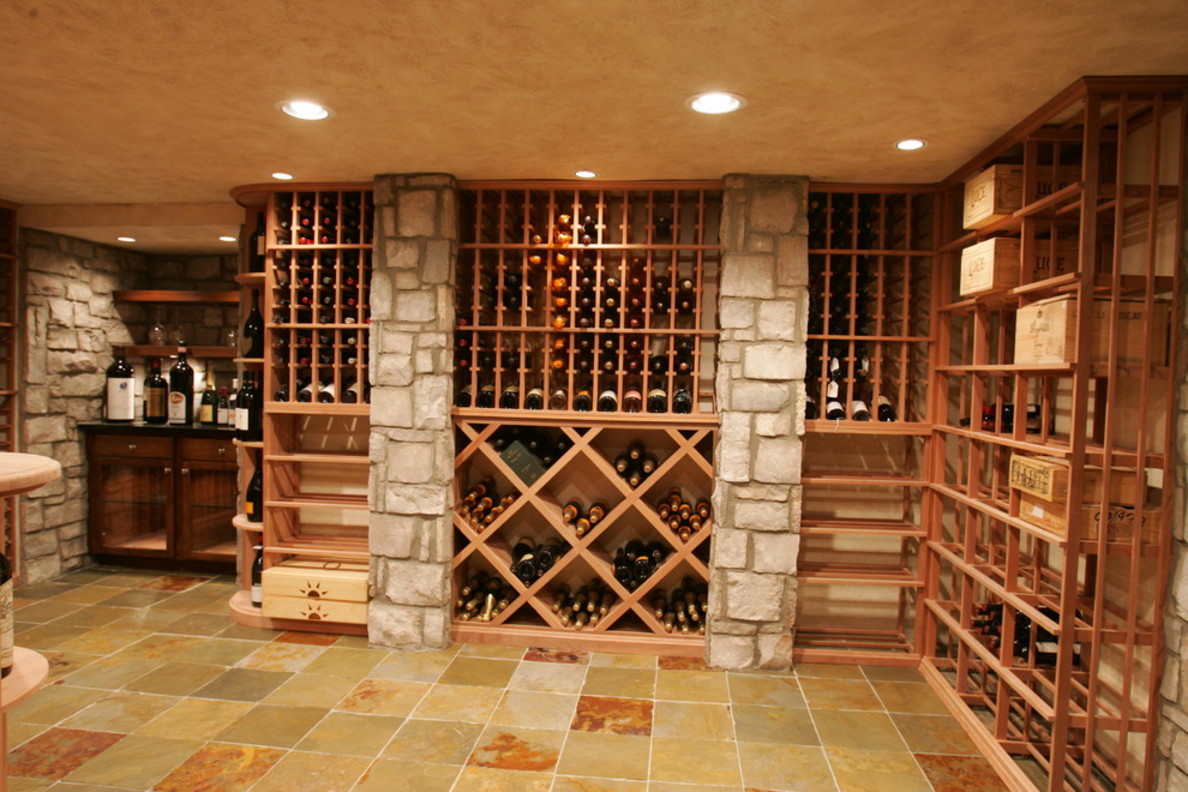
Now that you have the main points down, we can move on to storage. Another key aspect of wine storage is bottle position.  Placing bottles on their sides keeps the corks wet.  When corks dry out, oxygen can reach the wine and cause it to oxidize.  This will spoil the taste of your wine.  You can get wine cellar racks in pre made kits, or have them custom built for your room.

Décor and friends to enjoy your wine cellar with is the last piece to your addition.

Contact us today if you are interested in adding on a Wine Cellar to your next remodel.

Plaster from the 15th century with 21st century appeal

ven-plaster.jpg

Plaster from the 15th century with 21st century appeal Just say it, “What the heck is Venetian plaster?” I knew you wanted to ask, because I was thinking the same thing.  Venetian plaster is a technique for applying plaster not a type of plaster. Venetian plaster is a technique used to wall, ceilings, raised for curved surfaces to give it heightened stucco like appearance. This method of application was preferred by the craftsman of the 15th century in Venice, Italy, hence its name.

plaster

The primary method for applying Venetian plaster to a wall involves using a trowel, putty knife, or spatula to apply the plaster in thin, successive layers that are allowed to individually dry before the next layer is added. The initial layers need to be thinner and smoother than later layers so that the plaster will adhere to the wall effectively over time. As additional layers of Venetian plaster are applied, the objective is not to create a smooth surface, but to work patterns and textures into the plaster that are maintained after it has dried. A final thin layer of Venetian plaster is applied to seal the surface imperfections, and, after this has dried, the surface is usually lightly sanded to polish it and remove any imperfections that could lead to chipping or cracking. The end result is a semi-gloss marbleizing effect where the plaster has subtle color and texture variations that change with lighting and different angles of view.

venitian plaster walls

As you read Venetian plaster takes time and a lot of patience; better to leave it to the professionals. But be careful: Though many companies currently market products claiming to be Venetian Plaster, few really are. Most are simply thick acrylic paints with silicates that mimic marble if applied in thin layers and burnished. Though having a similar appearance and finish to natural plasters, there are some key differences and the finish will not be the same. The great thing about Venetian plaster is the fact that it can be purchased Tinted or you can paint over the plaster.

Venetian plaster adds a classic finish to your home; any room can get the look of Italian elegance. Contact Spazio LA today for a quote on your home remodel or Venetian Plaster project.


Is there a Wood that is tougher than nails?

ipe-deck.jpg

Is there a Wood that is tougher than nails? contemporary-deck

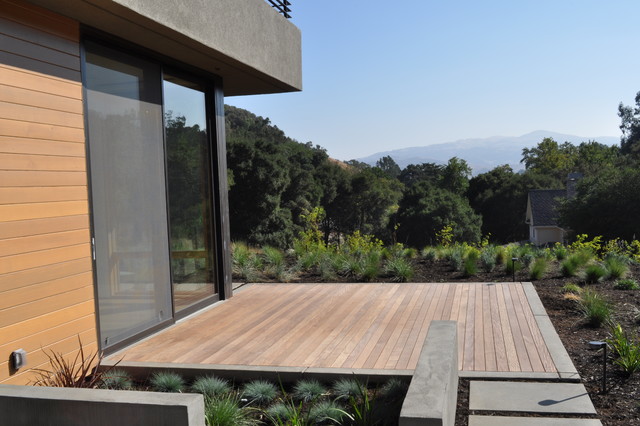
Ipe is a hardwood from the Brazilian rainforests and it's as hard – or harder -- than nails. Ipe is so dense that must be pre-drilled before installation. Ipe is one of the densest hardwoods available, three times harder than cedar. You can find most people whom are used to Ipe comparing its strength to that of steel. It's nearly impossible to drill holes in the wood after placing it on the deck, which is why most builders will drill holes with specialized tools before placing the wood on the deck and securing it in place. Due to its amazing durability it is most often used in outdoor remodels, such as decks and patios. It can be used inside your home, but must be kiln dried to remove moisture before doing so. Ipe can make beautiful cabinets and flooring.

Ipe can last over 40 years in an outdoor setting, which is great news for those who want an Ipe deck or patio. This lumbar is pest, weather, scratch, and mold resistant. This hardwood is so great that you will not have to worry about moisture damage, and sealing your deck is a thing of the past. Ipe also has the same fire rating as concrete and steel, meaning it resists flames much longer than softer woods, and is so dense that it doesn't float in water. Don’t go setting your deck on fire to test this fire rating, but in the event of a fire on your deck, you are in the safe zone.

Ipe wood can cost anywhere from $3-$10 per square foot, so be prepared when you budget for your remodel. Though it does cost a little more than other types of hardwood, many people find that the benefits and look of Ipe outweigh any budget increase. Think of the savings you will have since you won’t be needing to seal and reseal your Ipe wood deck, or replace your deck!

Ipe tips:

-          Let Ipe rest in the area in which you will be installing it for 7 days prior to use, unless otherwise directed. This will allow the Ipe wood to get acclimated to the local temperature and humidity.

-          Don’t store Ipe directly on the ground during the acclimation period.

-          Do not cover with a tarp or plastic while the Ipe wood is adjusting to the temperature.

-        Expect the IPE Decking prices to fluctuate between various companies – each and every company has different operation expenses and over-head.

Ipe is a great choice for a beautiful deck or patio, built to last a life time.

Is bamboo flooring right for your home?

bamboo.jpg

Is bamboo flooring right for your home? bamboo-flooring-inspiration

Use these helpful tips to avoid Bamboo blunders in your home. Bamboo is an exotic and beautiful natural flooring choice with numerous attractive qualities that it can lend to a variety of environments. There are more than one type of Bamboo flooring as well, Horizontal Bamboo, Vertical Bamboo, carbonized, natural, tinted and hand scraped Bamboo flooring are amongst the options. No wonder its becoming ever so popular in home remodels.

However it also has some inherent vulnerability which can cause problems under certain conditions. Understanding the limitations of the material, and the reaction that it will have to certain elements will help you to make an informed purchasing decision. Those elements can include; heat, moisture, humidity, staining liquids and high traffic use.

While bamboo is a relatively hard material, it can be subject to scratches, dents, and cracks under certain conditions. Over time pet nails, or unpadded high heels can cause unsightly marks and scratches in the floor, and if furniture legs are carelessly dragged across its surface permanent damage can be the result. Even small particles of dirt and debris can act like grit, sanding and scoring the flooring, wearing off the protective top coat, and overtime give it a dull appearance. It is recommended to avoid Bamboo flooring in such areas as; a moderate to heavily used bathroom, and even in a kitchen you must be careful to ensure proper upkeep.

I know what you are thinking, I will just clean it more and avoid damage to make the flooring last longer! Wrong! You should never immerse a bamboo floor in water, so wet mopping isn’t an option. The water will damage the wood and cause the Bamboo floor boards to swell, lift and separate. Thus you will be left spend thousands to replace the damaged floor. This means that regular cleaning will require a little bit more work and care then simply sopping the surface with suds once a week. Sweeping and vacuuming regularly will help to get rid of small dirt particles that can cause scratches. You can occasionally damp mop the floor once you have removed all particles that could scratch the surface.

Bamboo is a beautiful choice for flooring in your home remodel; we want you to make the best choice based on your life style and commitment to maintenance.  Contact us today to help you with your remodel needs, right down to the floor.

Battle of the Countertops: Quartz vs Granite

Battle of the Countertops: Quartz vs Granite If you are following the kitchen trends you may have noticed that Granite countertops are becoming a thing of the past. Quart countertops are stepping into the spot light in kitchen remodels.

Here I will run you down the pros of both and you can decide for yourself.

Pros of Quartz -Durability or long-lasting nature is one of the major aspect that you should look for in a countertop. Quartz countertops are known for their durability as they are harder than most of the other countertops. Many companies give warranties with the quartz countertops. -Quartz countertops are more resistant to staining, cracking and corrosion that many of the other countertop options. As it is not porous, it is much more stronger and long-lasting. -One of the other benefits of quartz countertops is that once installed, you need not care for it. It is literally maintenance free.Quartz countertops are also mold and mildew resistant. Therefore, you can consider them food-safe and excellent to use. -As these countertops are available in myriad colors, you can find the one that suits your kitchen interior perfectly. Secondly, you can also try different color combination to get a modern and creative look. Quartz has a natural stone appearance and hence, it is suitable for every kitchen type: be it modern, classical or even the antique country types. -Cleaning quartz countertops for kitchens is easy and does not require much time. Quartz countertops can be cleaned with simply water, soap and water or with manufacturer's products (for heavy stains), at home. -Lastly, note that once installed (they do not require sealing), these countertops are hassle free.

Pros of Granite

-Granite countertops look awesome. They are oh-so-elegant and a total treat to the eye. After a long day's work, just the sight of that sleek sheet of rock in the kitchen will get you in the mood to whip up a lip-smacking dinner. -Granite is available in a variety of colors, patterns, grains and designs. Actually, the word 'variety' would be an understatement. With over 3,000 granite countertop designs available, one would have to say there is a wide variety in the variety of varieties available! -A granite countertop can have a polished finish or it can be left as it is to give it a more natural and unfinished look. An unfinished countertop is a good option if you prefer to have your kitchen nice and simple, whereas a polished one adds a bit of class and does enough to give your kitchen design the modern and contemporary touch that it needs. -Durability is one of the biggest advantages. Once you have finished installing a granite countertop, you can just forget about it. Its longevity and low maintenance requirements make it a favorite among homemakers. You can clean a granite countertop with normal soap or by using a strong detergent too. Most granite countertops are resistant to chemicals so you shouldn't have any problems in using a chemical based detergent. -Being highly water resistant, you do not have to worry about having spilled water or any other liquid on the countertop. All you should ensure is that you wipe it and keep it dry. This is because water or any other liquid, if left standing on the countertop for too long, may slightly stain the granite at the surface. -Countertops made from granite are heat resistant and can withstand high temperatures. At the same time, they are also resistant to a number of bacteria. If you spend some time browsing through the internet you’ll find a range of different reviews about quartz vs granite. While one homeowner will tell you that you absolutely, positively must get a quartz countertop, another reviewer will insist upon buying granite counters. When you do spend some time reading through these reviews, however, you will notice one point that stands out.

Both quartz and granite countertop owners are defending their own personal choices with a vengeance because they are so completely pleased with their counters. At the end of the day, you can walk away from these reviews knowing that choosing either quartz or granite stones will provide you with a countertop that you’ll love!


Remodeling can't get better than this

Why we are the best at what we do!  

It is hard to find good remodeling companies, not to boast or brag, but we are one of the top in our industry. The top isn’t hard to achieve, and we will be the first to tell you that we have worked our hands to the bone to get where we are today. What makes us stand above the rest of the local Los Angeles area remodeling companies? We specialize in all areas of remodeling from new construction, additions, hardscape, and custom furniture, right down to the smallest details. Take a look at our work; you can see the great love for what we do in every design!

From the beginning stages of this company we knew that making dreams come true was our goal. You dream of this perfect kitchen, bedroom, bathroom, and this dream home that you thought up in your mind. It is easy to want a great remodel when we see so many inspirational designs and homes today. Us here at Spazio LA, take that dream and make it reality. Of course if your dream is to have a bathroom shower that flows liquid gold, we may not be able to deliver, but we will do our best to try to get there. We design your dream, show you what you want and show you what more it can be.  We don’t stop there, we build your dream! For so many happy clients we have built their dream home, and given them more than they could ask for.

Check out our About Us page for more information about the man behind the designs, Essi Safdie. Being passionate, driven and having an eye for design are a few of the reasons clients love working with Essi and the Spazio LA team. Over the years we have developed close relationships with other retailers in our industry to dramatically lower your cost and guarantee you are thrilled with your project. We want you to be comfortable with every aspect of the remodel process and know that your ideas do matter.

A 3D model is created before any project is started, this gives you a sense of ease to know that your dream is in the works of being designed and built. Our 3D models and the outcome of the project are near identical. Please visit our social media pages and follow our projects and inspirations.

Don’t wait any longer call today for your free in home consultation. Dream-Design-Build.

Get Inspired: Bathroom tile ideas

Bathroom-pasadena-2.jpg

Get Inspired: Bathroom tile ideas bathroom blog

Picking bathroom tile can be especially overwhelming if you know how many different tile products are out there and the million colors they come in. The good news is, once you choose the bathroom tile you want to install, one of the hardest parts of installing tile is over! Bathroom Tiles:

Natural Stone Porcelain Ceramic Glass Mosaic

master bathroom

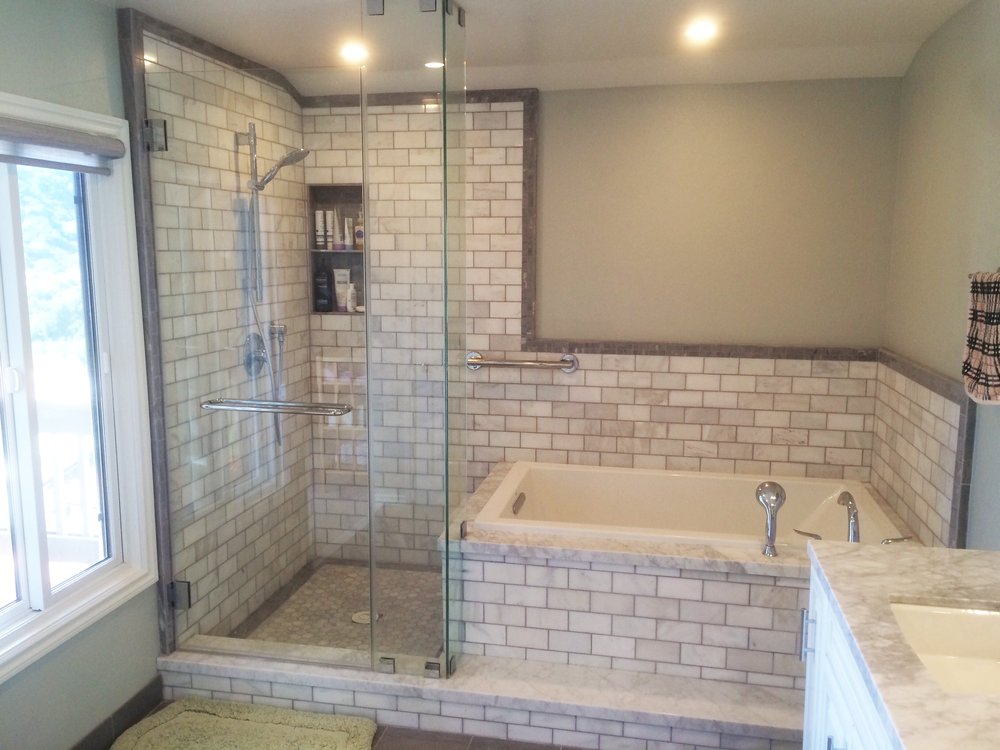
Understand the varieties of tile you can pick bathroom tile from. Make sure you do your research and look up the following types of tile: ceramic tile, glass tile, mosaic tile, porcelain tile, natural stone tile (marble, slate, granite, etc). This does not complete the bathroom tile list, as there are many more. Glazed ceramic tile is often used in bathrooms because it is water resistant and less expensive than other tile, but be sure to research sealants for other types of tile too. Natural stone can be a beautiful solution for your bathroom as long as you are ok with spending the extra money to seal it and make it work. You don’t have to stick with one material throughout your bathroom either. Mix stone with porcelain, or ceramic with glass. There is no right and wrong when defining style.

Now that you have an idea of all the different types of tile, we can go over what colors and pattern options there are. We all know that dark colors make a room feel smaller, so when picking tile colors choose a color that suits the bathroom size. Pops of color or contrasting colors are great for bathroom tile projects.

I love the look of our bathroom remodel; we went with a few different patterns and color options to create this custom look. You do not have to pick all one color tiles to achieve a sophisticated look. Tip: Choose colors that complement each other or draw from the other tile. Such as the brown boarder tiles and accent pattern drew from the dark colors in the granite tub top and counter top. If you have a small bathroom and you want to trick the eye into thinking it is bigger, you can opt for one or two light colors from floor to ceiling. This will give the room no sharp edges and an endless look. Small or large, there are plenty of tile colors and options to suit every style and budget.

bathroom blog 2 For project assistance or remodeling needs, Contact Spazio LA today. Dream- Design- Build.

Fall Home Improvement Tips

fall.jpg

Fall Home Improvement TipsFall is here! Although in Southern California we are the lucky ones who don’t have to prepare for the snowy winter that is in the near future, we do need to prepare for the weather change of the season. Fall is a great season to work on your house, as the weather is often at its most agreeable once the summer heat has gone. No one wants their eyes stinging with sweat as they work on home improvement projects. The following are 3 fall-friendly home improvement projects for homeowners looking to improve their homes now that the summer sun has set. 1. Roof repair 2. Window Insulation 3. Painting

Roof repair

First and foremost, fall is ideal for roof remodeling because you won’t have to be up on the roof with the summer heat bearing down on you. In addition, fixing up the roof in the fall ensures those winter storms so they won’t find their way into your home via leaks. A leaky roof in winter is hard to fix, as the roof surface can be slippery and rain can stop the progress on work. Addressing leaks in the fall can prevent damage to your home’s interior, which can mount up if a leaky roof is not addressed until the following spring.

Window Insulation

Whether you need your windows replaced or simply need to patch up any leaks, a proactive approach to leaky or older windows in the fall can save you from unnecessarily high heating bills come the winter. Fall is the ideal time to address a home’s windows because the temperature outside tends to be pleasant, and will save you money in the long run.

Painting projects

A fresh coat of paint or a new color scheme around the house can give a home an entirely new look and feel, and at a rather low cost. But paint can be pungent and the aromas may last if it’s applied at a time of year when it can’t dry while the windows are wide open. But interior painting isn’t the only painting project homeowners can tackle in the fall. Fall temperatures tend to be perfect for both interior and exterior painting projects. Be sure to check the weather forecast before making your first brush stroke, you wouldn’t want rain to ruin your work.

Stay tuned for more home improvement and remodeling tips.

Modern design takes over Sherman Oaks

Modern design takes over Sherman Oaks This remodel was one of the most challenging and rewarding remodels we had ever achieved a few years back. Modern at this level had not been seen in homes yet. No design or contracting company had ever attempted to go modern on this large of a scale. Take a look for yourself; this is one home remodel that will have you inspired. Spazio LA took over Sherman Oaks and changed the renovation game forever.

full remodel 4

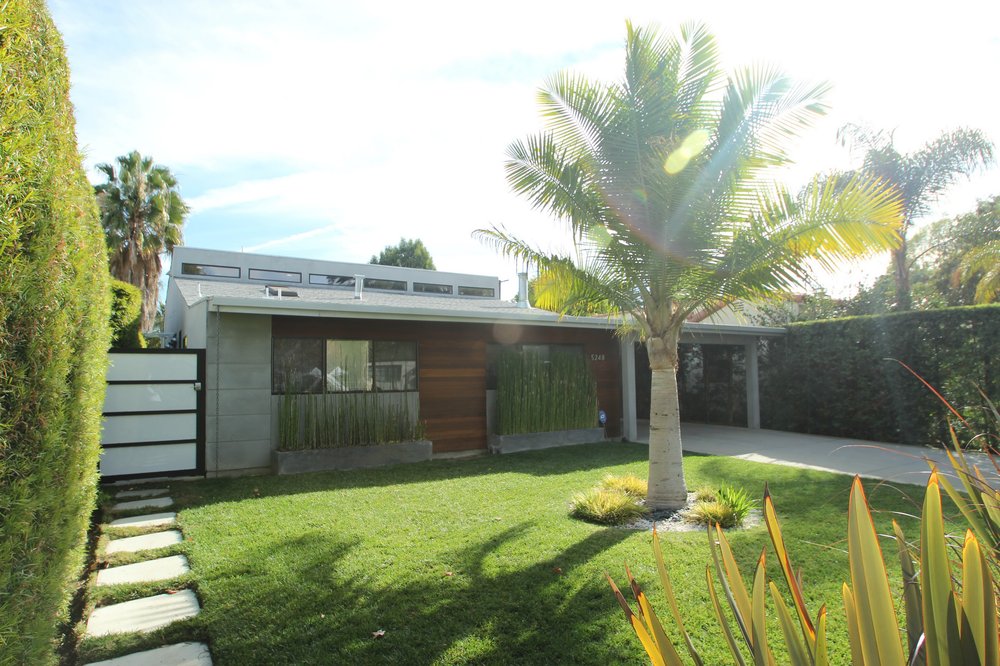
Can you say curb appeal? This home will have you breaking your neck to get a second glance as you drive past, you may even stop to be in awe. The landscape and hardscape is perfectly designed to create an easy to keep up yard and privacy. The garden boxes below the window house bamboo plants that will grow enough to block the heat, but will allow some light to pass through into the house. This makes it nice when you have curtains open but don’t want to expose your interior to the outside world. But once you are inside you can’t keep from falling in love with every detail and unique feature this home has! The sunken living room and dark flooring add a dramatic statement. Having a lower level living room can make a space feel larger if you are lacking space, and will create a cozy feeling. Let’s not forget the Custom built-in book shelves; this is a work of art all in its own. Do you know of any other home that has this? I don’t. That is why we are renowned for what we do; we bring your dream to life and give you a home that is as special as you are.

full remodel

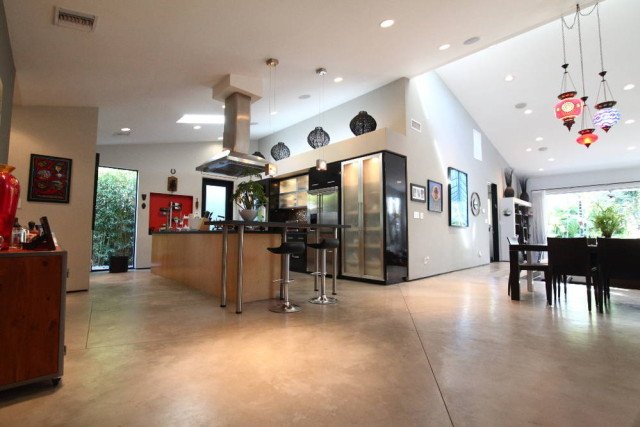
The kitchen and dining areas feature gorgeous Concrete floors. These floors are amazing and easy to clean, and amazing. Sorry, I just think the floors are amazing. The design of the home tells a great story of a love for modern art and design. The clean look of every angle is what inspires us to build dreams. One thing that you should take not of is the bar at the end of the island. This adds a place to eat when you don’t have the space on the island or want an overhang comfortable to dine at.

full remodel new construction

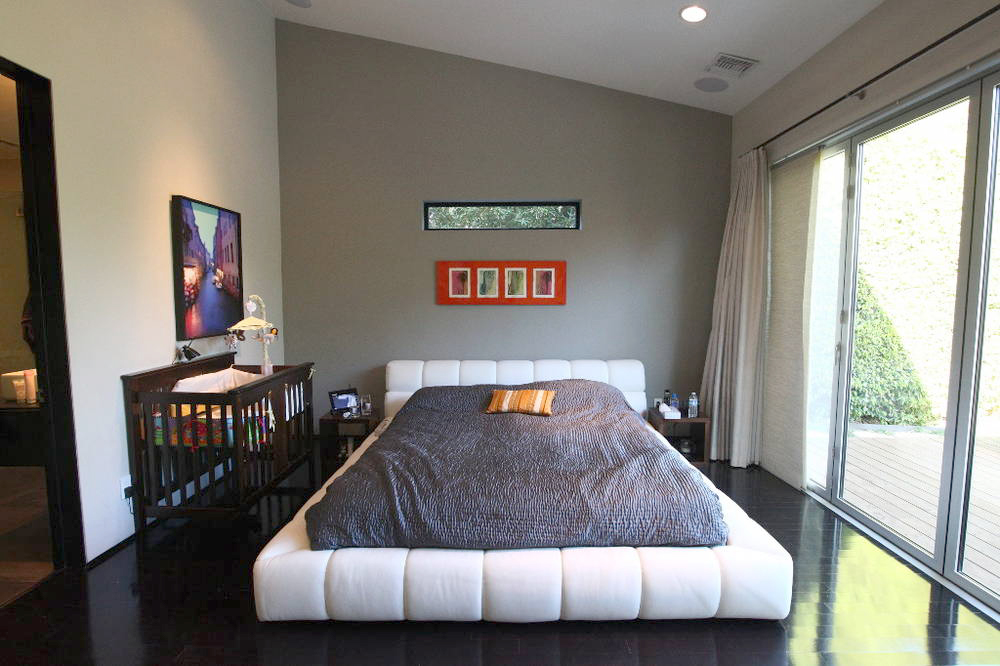
This remodel also included a baby nursey, master bedroom with attached spa bathroom. If you want information on this home remodel or would like your own home design, contact us today.

modern room for kids modern master bedroom design master batrhoom design